Sunday, December 25, 2011
Merry Christmas!!
It is Christmas!!!!!
One of my favorite times of the year! And it just isn't Christmas in my household without a gingerbread house. My sister and I have loved watching the professional gingerbread house making contests on T.V. for years and they always inspire me to make one of my own. In the past, as my mother will tell you, I have let my imagination go way above and beyond my mediocre gingerbread house making skills, resulting in a gigantic, lopsided, unfinished mansion, complete with sticky sugar glass lake and a molded marzipan swan like creature.
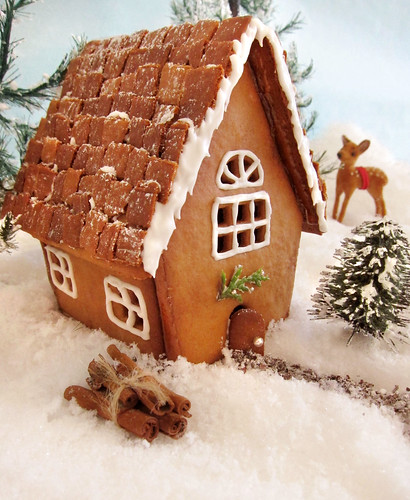
This year I have taken a different, much simpler approach and I stayed in the "quality over quantity" state of mind. I love how my quaint little woodland cottage turned out!
I used this Martha Stewart Tutorial for the entire project. The recipe, the template, and the methods. One thing I did change was the size. I printed her template on 60% instead of 100%. Each individual piece looks so small but once you put it all together it makes such a nice manageable sized house.
I made a few changes here and there that I will touch on as well.
Cutting and Baking the Pieces
The best tip I can give you throughout the entire process is utilizing your freezer! After you roll your dough, pop it in the freezer for 5 minutes. It is so much easier to cut out your pieces when the dough is frozen. Right before you bake them, freeze for at least 10 minutes. The tiny windows wont close up and your cut outs will be the exact same shape once you bake them. I moved the door from the long horizontal piece to the taller pointed piece and made that my front. Just a personal choice!
The Shingles
The Martha tutorial does not make individual roof shingles like I did. She pipes them on with royal icing. I really love how the gingerbread shingles look but they were by far the most time consuming thing. I wish I had taken pictures of this process but it is still fairly easy to explain. Roll some gingerbread dough over a silpat. I used a small 10 by 6 silpat. You want to roll the dough as thin as you can possibly get it. It doesn't matter if it sticks to the silpat, in fact it definitely WILL stick. So you roll and roll and roll until it is paper thin. With a knife, cut long crossing horizontal and vertical lines to create 1/2 squares. Freeze for 15 minutes. Bake at 350 for 3 to 6 minutes, depending on your oven. I let mine go a little into overdone territory because I wanted the roof to be dark. Once it cools, you can carefully break the pieces apart. You will have many casualties here and only about 3/4 will make usable shingles so make more than you think you need. I used about 75 per side. Another thing to look out for is the direction. I put my roof shingles on the opposite way than they should be. Does it really matter? No. But when you have a super "do it yourself" Dad who pretty much built your REAL house and will notice every inaccurate construction element, save yourself the lecture and put them on right! I also left out the chimney. Not by choice, I just forgot! I'm pretty sure my dog got a hold of the tiny chimney cutouts and ate them. I absolutely love how it looks on Martha's house though and would recommend making it!
The Sugar Syrup
Alright onto the next thing. In Martha's tutorial, she uses caramelized sugar to glue the pieces together instead of royal icing. Slightly more dangerous, but brilliant! This worked like a dream. You just carefully brush it along the edges and it hardens within a few seconds. Once you get the house put together, it is not going anywhere. I began to attach the roof shingles using the sugar and for the first 2 rows, things were looking good. But after a few minutes, the sugar syrup was starting to get hard. The syrup would harden before I could even get the shingles to to roof. After lots of reheating and a bunch of broken shingles I decided that the sugar syrup just was not the right medium for such a slow tedious job. I made a quick batch of royal icing (1 egg white, 1.5 cups powdered sugar) and finished the job that way. Much better.
With the leftover royal icing, I added a few details around the roof and windows, a festive sprig of rosemary above the door and a silver sprinkle doorknob. My favorite little trick here is the pathway! I used ground coffee mixed with a little powdered sugar and it looks just like gravel.
I'm so happy to be posting again. The new year always brings new inspiration. I hope everyone is having a wonderful day with their families and friends! Merry Christmas and Happy Holidays!
Monday, September 12, 2011
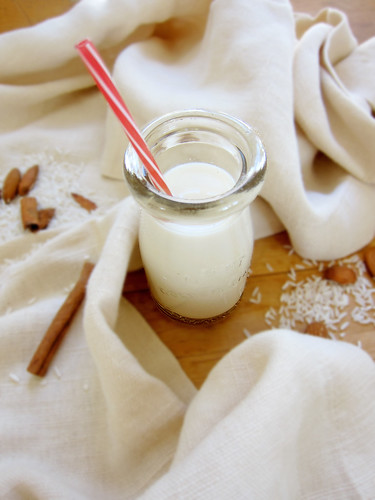
Cinnamon Almond Horchata
This recipe makes for a richer and thicker version of traditional horchata. To lighten it up a bit, substitute a couple cups of the milk for more water, or use skim milk!
Horchata
Makes about 1.5 gallons
Ingredients:
1-3/4 cups long grain white rice
1 cup blanched almonds
9 cups water
4 cinnamon sticks
4 cups milk
3/4 cup sugar
1 can sweetened condensed milk
1 teaspoon salt
3 teaspoons vanilla extract
Blend rice, almonds, cinnamon sticks and as much water as you can fit in a blender or food processor until rice and cinnamon is broken down into a sand like consistency. Combine with remaining water in a bowl and refrigerate at least 5 hours, preferable over night. The rice starts to release its starches and settles at the bottom so give it a good stir every so often!
Combine milk, sugar, sweetened condensed milk, salt and vanilla till sugar is dissolved.
Strain the rice mixture through a fine mesh sieve. Combine with the sugar milk mixture.
At this point, I funnel the horchata back into empty milk jugs and continue to flavor to taste; a little more cinnamon or a little more vanilla. Whatever you like! Make sure to give it a good shake every time you pour to stir up all the good stuff that settles on the bottom!
Wednesday, August 3, 2011
Spanish Flan with Candied Blood Orange and White Chocolate Coconut Crunch
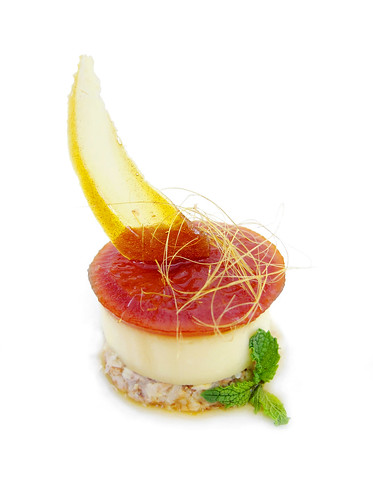
This flan recipe is as easy as it gets!! The white chocolate coconut crunch adds a wonderful texture and tropical flavor. It is pretty much that same thing as the chocolate hazelnut crunch from my chocolate panna cotta post. For more detailed instructions on how to make the crunch layer, go here! The candied blood orange has just the right amount of tang and bitterness to really balance out the sweetness from the rest of the dessert. This flan can be served as is for a delicious simple custard. And with a few extra special touches it is transformed into a wonderfully complex summer dessert!
Coconut Blood Orange Flan
Makes about 6 3-inch round individual flans
For the flan:
1 cup sugar
4 eggs
1 (14 ounce) can sweetened condensed milk
1 (12 ounce) can evaporated milk
1 tablespoon vanilla extract
Preheat over to 350 degrees F.
Place baking dish of choice into the oven to preheat. This helps to prevent the caramel from hardening too quickly. I baked mine in an 8 inch square glass baking dish. You are going to bake the flan in a water bath (or bain-marie). All you need is another baking dish large enough to hold the flan, with sides high enough for about 2 inches of boiling water.
In a medium bowl, whisk together eggs, sweetened condensed milk. evaporated milk, and vanilla extract till completely combined. This can be done in a blender or food processor as well.
In a heavy bottomed saucepan, cook the sugar over medium high heat. After about 7 minutes, you will notice the sugar start to melt. Try not to mix the sugar too much, as you don't want to create sugar crystals in your caramel. Once the majority of the sugar is melted and begins to turn a light caramel color, stir with a wooden spoon. Once completely melted, pour caramel into the bottom of your preheated baking dish. Immediately pour custard over caramel.
Place custard dish into the water bath and place in preheated oven. Cover with foil and bake for 1 hour, or until the flan is mostly set with a slight jiggle in the very center. Cool on the counter for about 45 minutes. Place in refrigerator for at least 30 minutes, up to overnight.
You can turn the custard out on a large plate and cut any way you like. I used a 3 inch round biscuit cutter.
For the White Chocolate Coconut Crunch:
2 large eggs
3/4 cup milk
1/2 cup cold water
1 cup flour
1/2 cup heavy cream
3 tablespoons butter
1/2 cup sweetened coconut, lightly toasted
3/4 cup white chocolate, melted
Preheat oven to 350 degrees.
In a medium bowl combine eggs, milk, water, flour and melted butter. Heat a sauce pan over medium low heat. Coat with cooking spray. Because these crepes are going to be baked and broken up, it really doesn't matter how they look. They can rip and tear, they can be underdone or over done. This is the most relaxing crepe experience you will ever have!!
Once you have cooked all your crepes, lay them on sheet pans, careful not to overlap. You will need about 4 separate sheets or you may need to work in batches. Bake at 350 for about 20 to 30 minutes. This can turn on you quick so keep an eye on them. If you notice the edges start to brown, carefully break them off with tongs. Once all the crepes are a nice golden color, place in a food processor and pulse till ground.
Heat heavy cream and butter over medium heat to a simmer. Pour over white chocolate and let sit about 5 minutes till chocolate is melted. Whisk till smooth. Add coconut and stir to combine. Spread in a parchment lined 13x9 inch pan and cool in refrigerator. When ready to use, cut into whatever shape you would like, I used a 3 inch round biscuit cutter, to fit underneath the flan.
Candied Blood Oranges:
2 cups sugar
1 cup water
2 to 4 small blood oranges, thinly sliced
Combine sugar and water in medium heavy bottomed sauce pan. Heat till sugar is dissolved. Add blood orange slices. Bring to a boil and cook for 2 more minutes. Remove from heat. Let oranges sit in the mixture till completely cool, about an hour to 2 hours.
To assemble, place white chocolate coconut crunch round on plate. Top with flan. Garnish top with blood orange. This would also be great with a little whipped cream or possible some vanilla ice cream on the side!
These sugar decorations from Alton Brown always add a nice little touch as well!
Monday, August 1, 2011
Iced Rose and Mint Green Tea
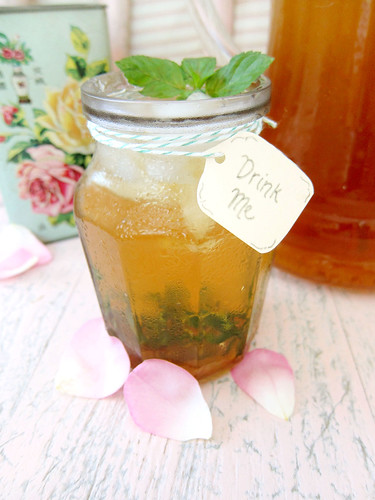
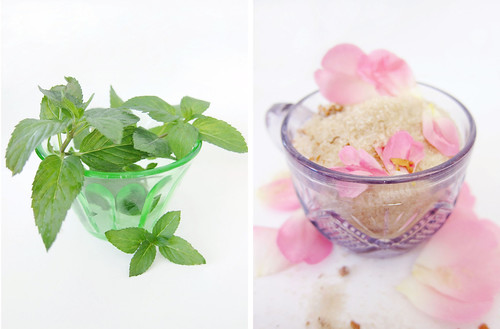
Well, we are just about halfway through summer now and it is hotter than ever. Nothing cools you down better on these days than a big glass of something icy cold to drink. I am such a big iced tea drinker so this one was a no brainer for me. I wanted to add a little something whimsical and fun to my iced tea this time. I love mint in my tea and I have it growing fresh in the garden so that was first on my list. Remember that rose petal sugar I used for the rose and pistachio macarons? I used the last bit of it up in this refreshing iced tea!
Iced Rose and Mint Green Tea
Makes about 7 cups of tea
Ingredients:
5 green tea bags
4 cups water
3 cups ice
1/2 cup rose petal sugar
1/4 cup fresh mint leaves
Bring 4 cups of water to a boil. Pour over tea bags and steep for 3 minutes. Remove tea bags and add ice.
For the simple syrup:
Combine rose sugar and mint leaves with 1/2 cup water and bring to a boil. Cook until sugar is dissolved. Add to iced tea to taste.
Sunday, June 19, 2011
Wedding Cake Tasting
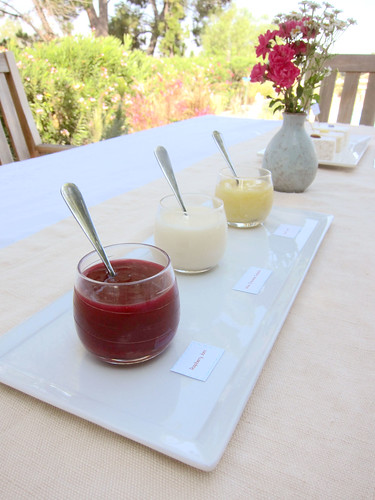
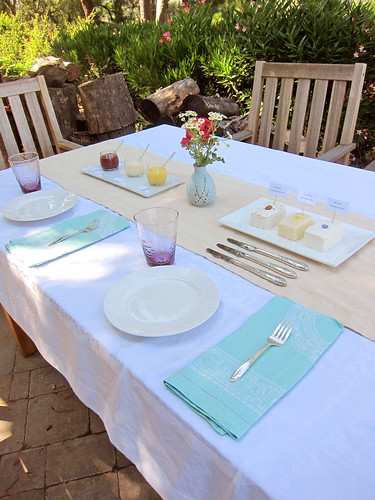
Wow!! Has it really been almost 3 months since my last post? Man, time has been flying by so quickly, it is almost scary. Life has been so busy, it seems I have been neglecting my blog a bit! But I managed to capture a few photos from a wedding cake tasting I did recently. A long-time family friend is getting married this fall and she has given me the honor of creating her wedding cake.
Raspberry Jam, White Chocolate Ganache, and Meyer Lemon Curd
Almond Cake with Crushed Almond Butter Cream, Lemon Cake with Cream Cheese Icing, and Yellow Cake with Vanilla Bean Butter Cream
Tuesday, April 5, 2011
Chocolate Cupcakes with Strawberry Butter Cream
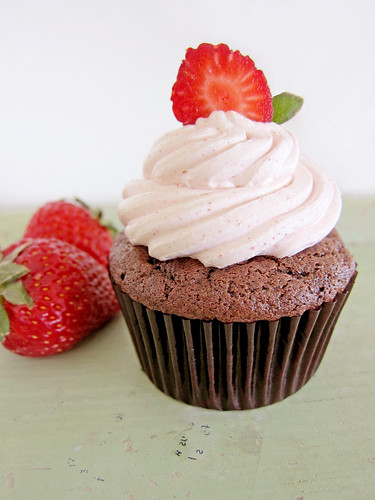
The perfect cupcake for spring! I used this chocolate cupcake recipe. It is the perfect standard chocolate cupcake. For the strawberry butter cream, I folded pureed strawberries into Martha Stewart's butter cream recipe. After adding the strawberry puree, I found the flavor wasn't strong enough. I had some strawberry Jello in the pantry and added a tablespoon which really upped the strawberry flavor. This is totally optional and next time I would just make more strawberry puree!
Strawberry Butter Cream
Makes 5 cups
For the strawberry puree:
9 oz. frozen strawberries
2 tablespoons water
2 tablespoons granulated sugar
In a small saucepan, heat the strawberries and water will boiling. Reduce to a simmer and cook for 20 minutes. Cool slightly and puree in a blender or food processor. Strain through a fine mesh sieve. Return strawberry puree to saucepan and add sugar. Cook another 5 minutes until thickened. Cool completely
For the butter cream:
5 large egg whites
1 cup, plus 2 tablespoons granulated sugar
1/4 teaspoon salt
4 sticks unsalted butter, room temperature
2 teaspoons vanilla extract
Strawberry puree
1 tablespoon strawberry Jello powder or 1 teaspoon strawberry extract
Combine egg whites, sugar, and salt in a heat proof bowl. Set over small saucepan of simmering water. Whisk constantly until the sugar is dissolved and the mixture is hot to the touch. It will become slightly thickened and opaque.
Place in the bowl of a stand mixer with the whisk attachment. Beat on high speed for 10 minutes, until the egg whites have completely cooled.
With the mixer on high, add the butter one tablespoon at a time, fully incorporating after each addition. Once all of the butter is add, continue to beat for another 5 minutes. Add the strawberry puree, vanilla and strawberry jello powder and mix just till combined. Frost cooled cupcakes and top with a slice of strawberry.
Tuesday, March 22, 2011
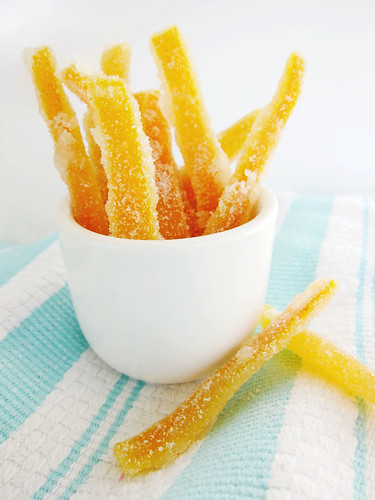
Candied Orange Peel
Great as a garnish, or on it's own. You can also cover these in chocolate!!
Candied Orange Peel
3 to 4 oranges
2/3 cup water, plus extra for boiling
1 cup sugar
Using a vegetable peeler, peel the oranges. Try to get as much of the peel as you can, including the white pith. Cut into thing slices about 1/8 on an inch thick. Bring about 2 cups of water to a boil. Boil the peels for 5 minutes. Drain and repeat. This removes most of the bitterness. Combine with 2/3 cup water and the cup of sugar. Bring to a bowl and reduce to simmer. Add the orange peels. Simmer for 5 minutes. Cool. Transfer to a small bowl and let the orange peel sit in the syrup overnight. Remove from syrup and toss in granulated sugar. Lay out until dry and firm.
Wednesday, March 16, 2011
Herbed Irish Soda Bread with Parmesan Spinach Butter
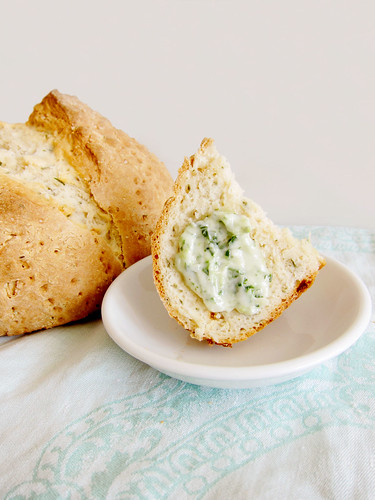
Irish soda bread has a bit of a bad reputation for being dry and kind of bland. It is also usually studded with raisins. Growing up, I hated, no, detested raisins. They were the chocolate chip's evil twin, lurking in my cookies. Now that I am older, I like raisins and all things raisiny; dried figs, dates, etc. But I still sometimes have a slight aversion to those pesky raisins. Here is a delicious and full flavored recipe for Irish soda bread with rosemary, sage, thyme, parsely and dill. Perfect for St. Patrick's Day!
Herbed Irish Soda Bread
Recipe by Darina Allen
Ingredients
3 1/4 cups unbleached flour
1/2 teaspoon salt
1/2 teaspoon baking soda
2 tablespoons plus 2 teaspoons freshly chopped herbs, such as rosemary, sage, thyme, dill, and parsley
12 to 14 ounces buttermilk
Directions
Preheat oven to 450 degrees.
Mix all the dry ingredients together in a
large bowl, make a well in the center and pour all of the buttermilk in at once. Using 1 hand, stir in a full circle starting in the center of the bowl working towards the outside of the bowl until all the flour is incorporated. The dough should be soft but not too wet and sticky. When it all comes together, a matter of seconds, turn it out onto a well-floured board. Roll dough around gently with floured hands for a second, just enough to tidy it up, flip the dough over. Pat the dough into a round about 1 1/2-inches deep.
This can also easily be made into a sweeter version by adding about 1/4 cup of sugar or honey, raisins, nuts, chocolate chips. You can pretty much put anything you would like in your Irish soda bread.
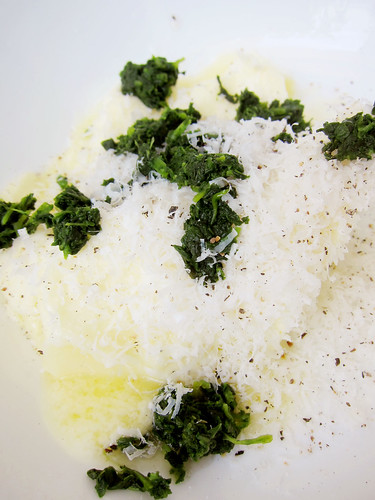
Parmesan Spinach Butter
1 stick unsalted butter, room temperature
1/8 cup grated Parmesan cheese
1/4 teaspoon freshly ground pepper
2 tablespoons cooked chopped frozen spinach, liquid squeezed out
Herbed Irish Soda Bread
Recipe by Darina Allen
Ingredients
3 1/4 cups unbleached flour
1/2 teaspoon salt
1/2 teaspoon baking soda
2 tablespoons plus 2 teaspoons freshly chopped herbs, such as rosemary, sage, thyme, dill, and parsley
12 to 14 ounces buttermilk
Directions
Preheat oven to 450 degrees.
Mix all the dry ingredients together in a
large bowl, make a well in the center and pour all of the buttermilk in at once. Using 1 hand, stir in a full circle starting in the center of the bowl working towards the outside of the bowl until all the flour is incorporated. The dough should be soft but not too wet and sticky. When it all comes together, a matter of seconds, turn it out onto a well-floured board. Roll dough around gently with floured hands for a second, just enough to tidy it up, flip the dough over. Pat the dough into a round about 1 1/2-inches deep.
Cut a deep cross on it with a sharp knife, prick the four sections all over with a fork to let steam out.
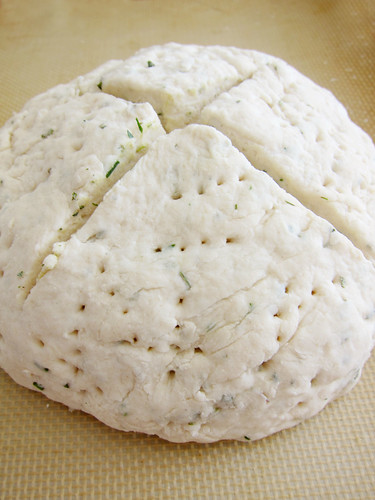

Bake in preheated oven for 20 minutes, then reduce the heat to 400 degrees for 20 minutes, or until just cooked. If you are in doubt, tap the bottom of the bread: if it is cooked it will sound hollow.
This can also easily be made into a sweeter version by adding about 1/4 cup of sugar or honey, raisins, nuts, chocolate chips. You can pretty much put anything you would like in your Irish soda bread.
Parmesan Spinach Butter
1 stick unsalted butter, room temperature
1/8 cup grated Parmesan cheese
1/4 teaspoon freshly ground pepper
2 tablespoons cooked chopped frozen spinach, liquid squeezed out
Combine all ingredients in small bowl until incorporated.
So there it is, delicious savory Irish soda bread. This goes so nicely with a hot cup of Irish Breakfast tea. Happy St. Patrick's Day!!
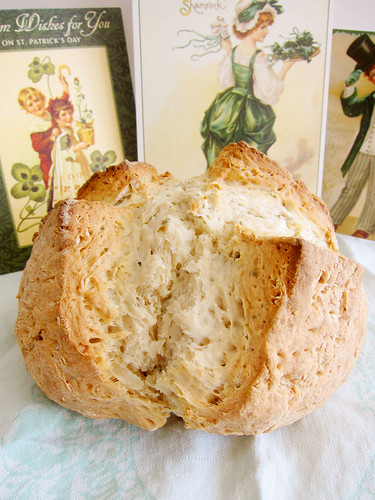

So there it is, delicious savory Irish soda bread. This goes so nicely with a hot cup of Irish Breakfast tea. Happy St. Patrick's Day!!

Monday, March 14, 2011
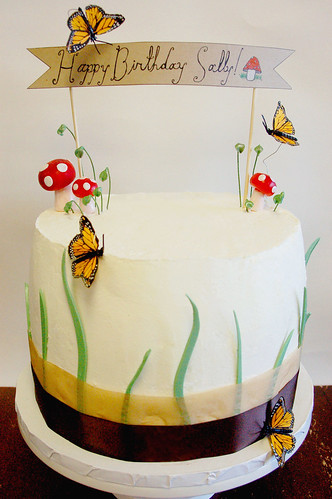
Butterfly and Mushroom Birthday Cake
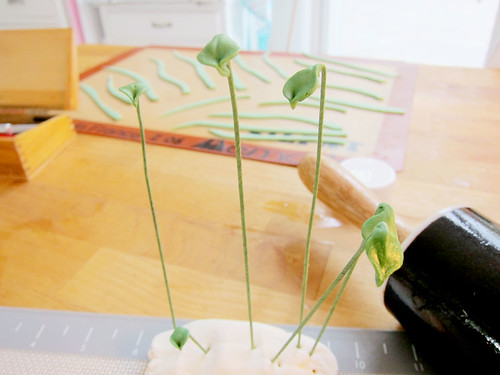
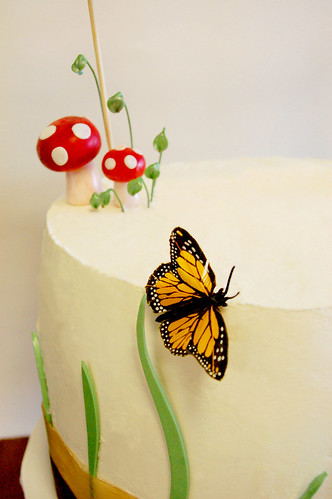
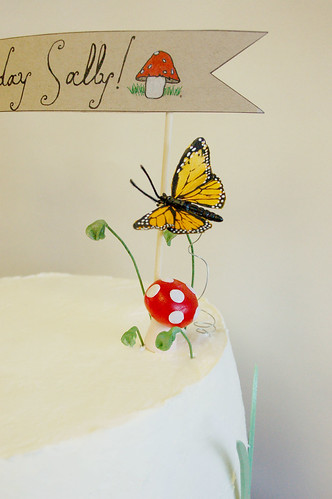
Working at a family owned chocolate and gelato shop has many delicious benefits! But it has also provided some awesome opportunities for letting out my creativity! Candace, gelato maker extraordinaire, got an order for a gelato birthday cake this weekend. We teamed up to create this cute cake. Candace made the actual cake, and Nicole and I did the decorating. The inside is dark chocolate, fig mascarpone, and strawberry balsamic gelatos layered between vanilla cake. YUM!! It is frosted in vanilla meringue butter cream. The mushrooms, leaves and grass blades are made of gum paste. I love how this turned out! Simple and whimsical.
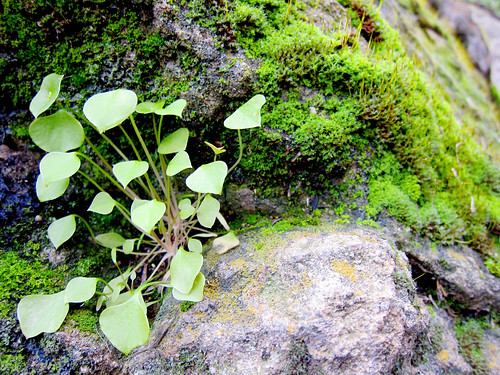
On a hike not too long ago, I snapped this shot and have loved these little leaves ever since! I thought they would go so well next to little mushrooms so I wanted to try and recreate them in gumpaste.

Nicole found these butterflies at Michael's. They were the perfect finishing touch!!
On a hike not too long ago, I snapped this shot and have loved these little leaves ever since! I thought they would go so well next to little mushrooms so I wanted to try and recreate them in gumpaste.


Nicole found these butterflies at Michael's. They were the perfect finishing touch!!


Hope you liked your cake, Sally!
Wednesday, March 9, 2011
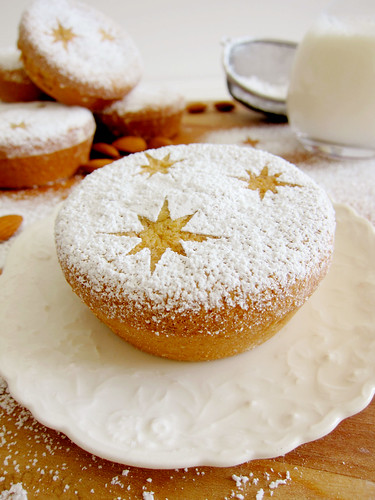
Almond Cake
Every Saturday, there is a farmer's market about 5 minutes from my house. For as long as I have lived here, my sister and I have loved going to the farmer's market to get tamales and the most amazing yet simple almond cake! A lovely French woman sells her rustic baked goods. She has a lot of vegan and gluten free items with a wonderfully old world feel to them. I have always loved the almond cakes because not only are they delicious, they are beautiful as well. She stencils on beautiful powdered sugar designs like hearts and peace signs. I finally have come up with a recipe that mimics this cake pretty closely. While nothing compares to the joy of going to the farmer's market on a beautiful sunny Saturday and buying this cake from the sweet lady, it is nice to know if the craving hits I don't have to wait a whole week!
Almond Cake
Makes 6 large muffins, or 1 0-inch round
4 large eggs, separated
4 tablespoons brown sugar
1 teaspoon vanilla extract
4 tablespoons granulated sugar
1-1/2 cups ground almond meal
1/2 teaspoon salt
Preheat oven to 375 degrees. Grease and flour a 6-muffin tin or a 9-inch round pan.
Whisk the egg yolks, brown sugar and vanilla extract until sugar dissolves and the yolks are thick and light in color. Add the almond meal and salt, stir to combine.
Whisk the egg whites till frothy, gradually adding the granulated sugar. Continue whisking to soft peaks.
Add about a quarter of the egg whites to the almond mixture. The almond mixture will be fairly stiff so to start off, just mix in the egg whites vigorously to loosen the mixture. Continue to fold the remaining egg whites into the almonds. Pour into prepared pans. For muffin cups, fill about halfway and bake for 15 minutes. For 9-inch round, bake for 30 to 35 minutes. Cool and top with powdered sugar.
Tuesday, March 1, 2011
Potato Tart with Goat Cheese and Caramelized Onions
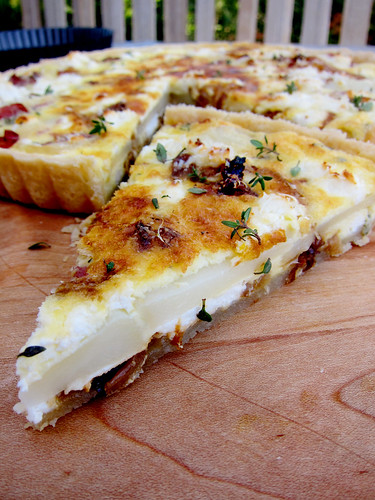
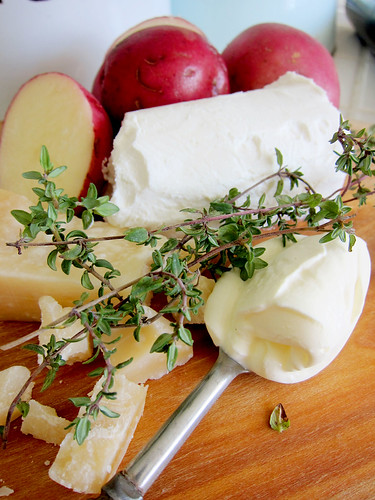
Well, I'm changing it up a bit today! I made a savory tart for a family get together and it turned out beautifully.
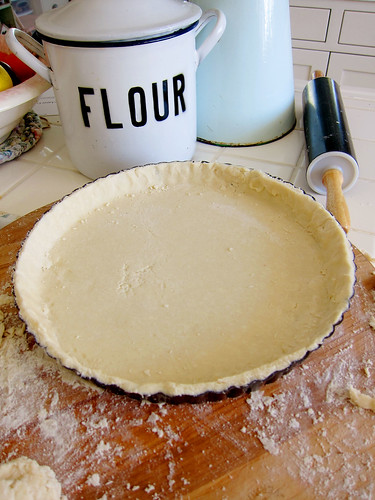
The first component of this delicious tart is the pie crust. Pie crust is one of the most simple things you can make. A few tricks and tips can turn a good pie crust into a great pie crust. There are only 4 to 5 ingredients needed in a pie crust; Flour, salt, butter or shortening, and water. Many recipes call for a mixture of shortening and butter. I find myself, more often than not, without shortening in my pantry. I have made many a pie crust sans shortening and have always been pleased with the results. The key concept in making crust is KEEP EVERYTHING COLD. The goal is to end up with a flaky, melt in your mouth crust, which can only be achieved by keeping everything cold. The cold butter gets chopped up by the food processor into tiny pea sized bits, which melt and steam once in the oven, creating layers. My go-to pie crust recipe is from Alton Brown, which I've adapted for this recipe.
Pie Crust
Makes enough for one 9-inch tart
Ingredients:
12 tablespoons unsalted butter
9 ounces all purpose flour
3/4 teaspoon salt
1/4 cup plus 3 tablespoons ice water
About 30 ounces dried beans, or pie weights for blind baking
Preheat oven to 425 degrees F.
Cut butter into small cubes. Place the butter, the flour, and the food processor blade in the freezer for about 20 minutes.
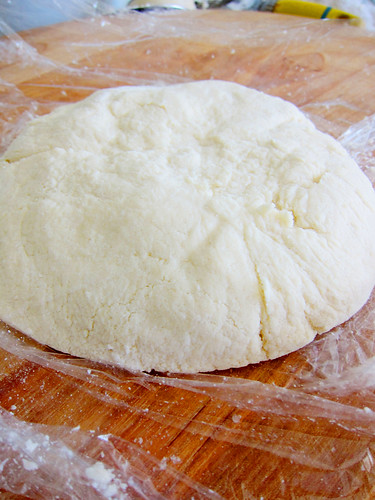
Place flour and salt in the bowl of a food processor fitted with the cold blade. Pulse to mix. Add the butter. Pulse about 20 times until the butter has been chopped up into tiny pea sized bits. Slowly add half the water, pulsing to combine. Once the mixture holds together when squeezed in your hand, the dough is ready. It may look a but dry and crumbly, but it will come together. Wrap in plastic wrap and refrigerate for at least 30 minutes.
Roll out the dough to about 1/4 inch thick. Press into a 9-inch loose bottomed tart pan.
Makes one 9-inch tart
Ingredients:
1 par-baked pie crust
1 tablespoon butter
1 tablespoon olive oil
2 medium onions
1 tablespoon brown sugar
4 medium red potatoes
140 grams goat cheese
1/2 cup grated Parmesan cheese
200 grams creme fraiche
3 eggs
2 tablespoons fresh thyme
Preheat oven to 350 degrees F.
In a medium saucepan, melt the butter and the olive oil. Thinly slice the onions and add to the butter and oil mixture. Cook over medium low heat for about 15 minutes. Once slightly browned, add the brown sugar and about 1/4 cup water. Reduce and continue to cook about 10 minutes until caramelized. Set aside.
Place potatoes in a large pot and cover with water. Bring to a boil and cook 10 minutes, just till potatoes are soft. Once cool enough to handle, thinly slice the potatoes.
In a medium bowl, combine the creme fraiche, eggs and thyme.
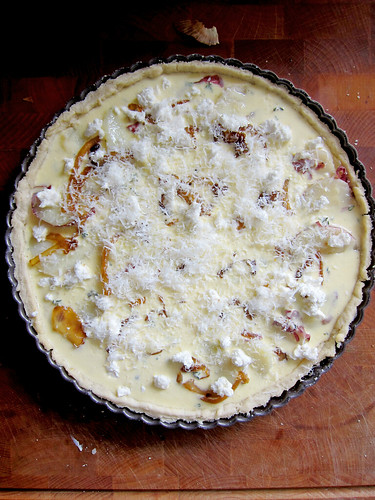
To assemble the tart, place half of the onions on the bottom of the pie crust. Sprinkle with half of the goat cheese and half of the Parmesan cheese. Layer the potatoes, slightly overlapping each other. Pour the creme fraiche mixture over the potatoes. Top with remaining onions, goat cheese and Parmesan cheese.
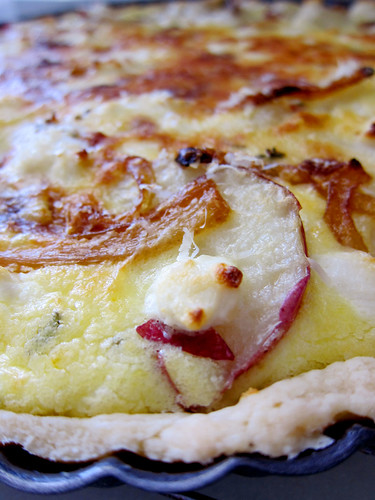
Bake for 35 minutes, until slightly puffed and golden brown.
The first component of this delicious tart is the pie crust. Pie crust is one of the most simple things you can make. A few tricks and tips can turn a good pie crust into a great pie crust. There are only 4 to 5 ingredients needed in a pie crust; Flour, salt, butter or shortening, and water. Many recipes call for a mixture of shortening and butter. I find myself, more often than not, without shortening in my pantry. I have made many a pie crust sans shortening and have always been pleased with the results. The key concept in making crust is KEEP EVERYTHING COLD. The goal is to end up with a flaky, melt in your mouth crust, which can only be achieved by keeping everything cold. The cold butter gets chopped up by the food processor into tiny pea sized bits, which melt and steam once in the oven, creating layers. My go-to pie crust recipe is from Alton Brown, which I've adapted for this recipe.
Pie Crust
Makes enough for one 9-inch tart
Ingredients:
12 tablespoons unsalted butter
9 ounces all purpose flour
3/4 teaspoon salt
1/4 cup plus 3 tablespoons ice water
About 30 ounces dried beans, or pie weights for blind baking
Preheat oven to 425 degrees F.
Cut butter into small cubes. Place the butter, the flour, and the food processor blade in the freezer for about 20 minutes.
Place flour and salt in the bowl of a food processor fitted with the cold blade. Pulse to mix. Add the butter. Pulse about 20 times until the butter has been chopped up into tiny pea sized bits. Slowly add half the water, pulsing to combine. Once the mixture holds together when squeezed in your hand, the dough is ready. It may look a but dry and crumbly, but it will come together. Wrap in plastic wrap and refrigerate for at least 30 minutes.
Roll out the dough to about 1/4 inch thick. Press into a 9-inch loose bottomed tart pan.
Line the tart with a layer of foil and fill the tart with the weights of your choice. Bake for 10 minutes. Remove weights and continue to cook another 10 minutes. Cool.
Potato Tart with Goat Cheese and Caramelized OnionsMakes one 9-inch tart
Ingredients:
1 par-baked pie crust
1 tablespoon butter
1 tablespoon olive oil
2 medium onions
1 tablespoon brown sugar
4 medium red potatoes
140 grams goat cheese
1/2 cup grated Parmesan cheese
200 grams creme fraiche
3 eggs
2 tablespoons fresh thyme
Preheat oven to 350 degrees F.
In a medium saucepan, melt the butter and the olive oil. Thinly slice the onions and add to the butter and oil mixture. Cook over medium low heat for about 15 minutes. Once slightly browned, add the brown sugar and about 1/4 cup water. Reduce and continue to cook about 10 minutes until caramelized. Set aside.
Place potatoes in a large pot and cover with water. Bring to a boil and cook 10 minutes, just till potatoes are soft. Once cool enough to handle, thinly slice the potatoes.
In a medium bowl, combine the creme fraiche, eggs and thyme.
To assemble the tart, place half of the onions on the bottom of the pie crust. Sprinkle with half of the goat cheese and half of the Parmesan cheese. Layer the potatoes, slightly overlapping each other. Pour the creme fraiche mixture over the potatoes. Top with remaining onions, goat cheese and Parmesan cheese.
Bake for 35 minutes, until slightly puffed and golden brown.
Tuesday, February 22, 2011
Citrus Tarragon Granita
What a beautiful day! The sun is shining, the birds are chirping, and I have the day off work!
In all honesty, it is a bit chilly outside, but I was still in the mood for something summery and refreshing. I feel like every single one of my blog posts starts with "This is the easiest thing ever!", but I really mean it with this one. All you need is a juice of your choice, a little sugar, a freezer, and a fork.
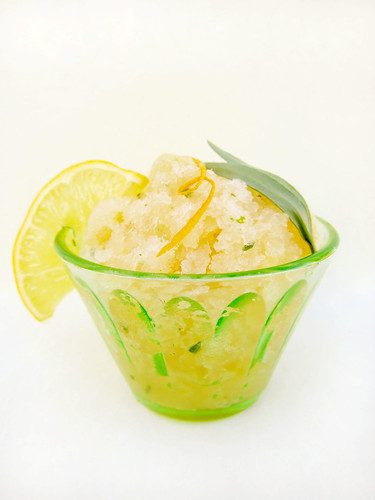
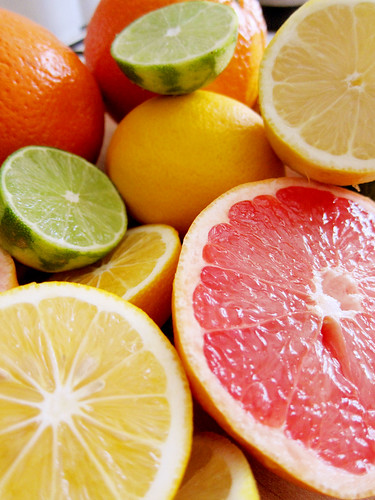
I decided to make mine today with a variety of citrus fruits and tarragon. Tarragon, also known as the King of Herbs by the French, is mainly used in buttery sauces and savory dishes. But it pairs wonderfully with citrus and brings a simple granita to a whole new level!
Another great thing about granita is that you can add as much or as little sugar as you like. And you can sweeten it with anything from sugar to honey to Stevia. It all works in this recipe.
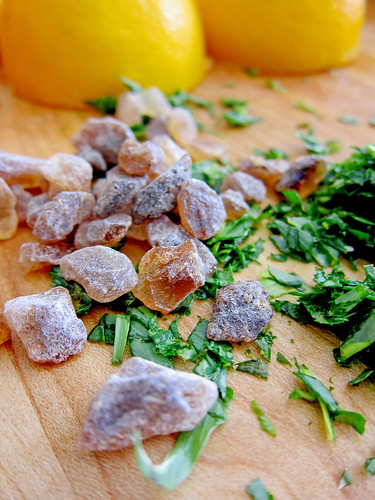
The other day while at the mall, I ran into a tea store simply to grab a sample so I could take an Advil. The salesgirl was SO nice and good at her job that I walked out of there with over $20.00 worth of tea related items. One of which was German rock sugar. Apparently it is sugar in its purest form and digests in the body really easily. Who knows if all that is true, but it looks really cool and tastes really good so I used it to sweeten my granita!
Citrus Tarragon Granita
Serves 10
3 cups orange juice
1 cup lemon juice
1/2 cup grapefruit juice
1/2 cup lime juice
Sweetener of your choice
2 tablespoons Gran Marnier
1 teaspoon each of lemon, lime and orange zest
3 tablespoons finely chopped tarragon
Combine all ingredients and pour into a shallow 13x9 inch pan. Place in the freezer. In 1 hour, remove from freezer and scrape sides with a fork. The mixture will still be mostly liquid at this point, only just starting to crystallize around the edges. Place back in freezer and continue to scrape every hour for the next 3 hours. You will end up with a light and refreshing icy treat, perfect for a warm night. This would also make a great cocktail, with a little vodka or tequila poured over the top.
Monday, February 21, 2011
Mexican Wedding Cookies with Vanilla Bean and Almonds
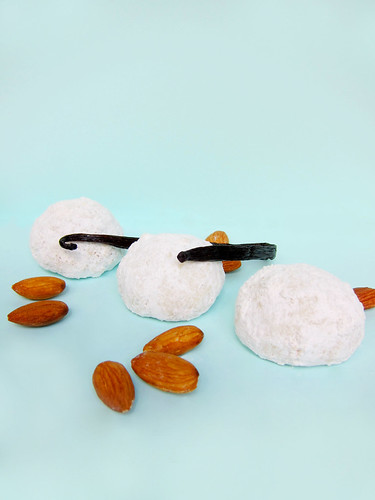
Wow! Life has been busy. So much has been going on. Finally have some time off for a little post.
These are a nutty shortbread cookie rolled in powdered sugar, traditionally served at Mexican weddings. This is a perfect party cookie as they are so easy to make and one recipe makes about 30 cookies. I made these with vanilla bean and almond. You can use any nut you like, or leave the nuts out all together. You can also flavor them many different ways. Someone suggested to me that they would be great with lemon!! You can definitely have fun with these.
Mexican Wedding Cookies
Makes 25 to 35
Ingredients:
1-1/2 cups butter, room temperature
3/4 cup powdered sugar, plus more for rolling cookies in
1 teaspoon vanilla extract
1 vanilla bean, seeded
3 cups all-purpose flour
1/4 teaspoon salt
1/2 cup finely chopped almonds
Directions:
Preheat oven to 350 degrees.
In the bowl of an electric mixer, cream the butter and the powdered sugar till light, about 5 minutes. Add the vanilla extract and vanilla bean seeds. In a separate bowl, mix the flour and the salt. Add flour to the butter and mix just till combined. Fold in the nuts.
Using 1 tablespoon per cookie, roll dough into balls. Place on parchment lined baking sheets 2 inches apart. Bake at 350 degrees for 15 minutes, till just lightly golden around the edges. Cool completely.
Toss cooled cookies into powdered sugar to coat. Repeat this until the powdered sugar stays dry on the cookie.
Friday, February 4, 2011
Book Page Heart Mobile
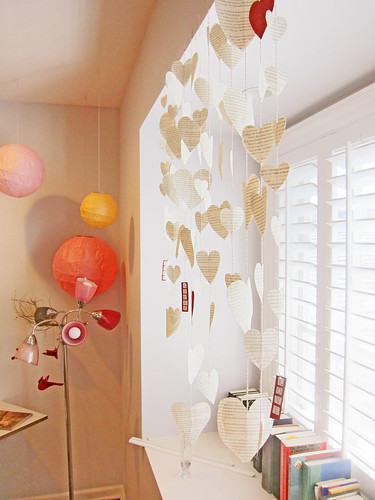
Here is a little something I have been working on for the past few days. I have lately come across Dottie Angel's blog and Flikr. Oh my god she is so amazing!! I plan on trying out so many of her wonderful crafts and this is the first project of her's that I have completed.
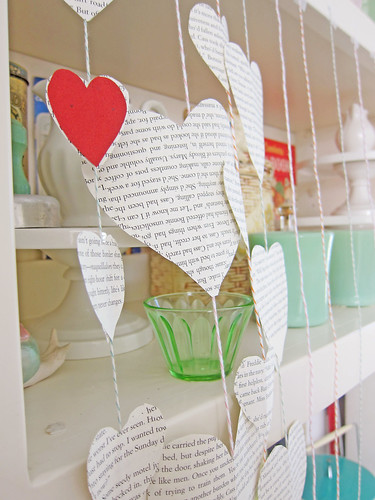
I definitely made this in the spirit of Valentine's Day, but I think I am going to keep it up all the time because it looks really cute! But mainly because cutting out all of those dang hearts was SO time consuming. Plus I sustained minor injuries to my finger and the loss of a book. Honestly, ripping out and cutting up pages from a book is so counter intuitive, but strangely satisfying all at the same time!

I definitely made this in the spirit of Valentine's Day, but I think I am going to keep it up all the time because it looks really cute! But mainly because cutting out all of those dang hearts was SO time consuming. Plus I sustained minor injuries to my finger and the loss of a book. Honestly, ripping out and cutting up pages from a book is so counter intuitive, but strangely satisfying all at the same time!

To do this, I cut out hearts in 3 sizes. Each heart on a strand is 2 hearts glued together, with the string running through the middle. I threw in a few random red hearts for a pop of color.
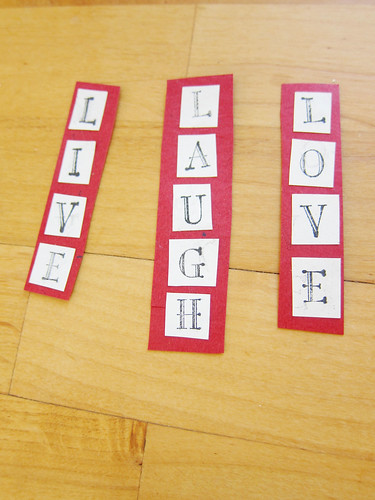
I am also super excited about my new set of stamps!! It is the alphabet in a fairly small size. It has proved to be very useful so far.Thursday, February 3, 2011
Valentine Venetian Cookies
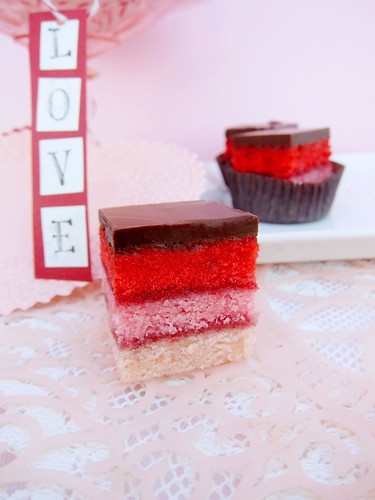
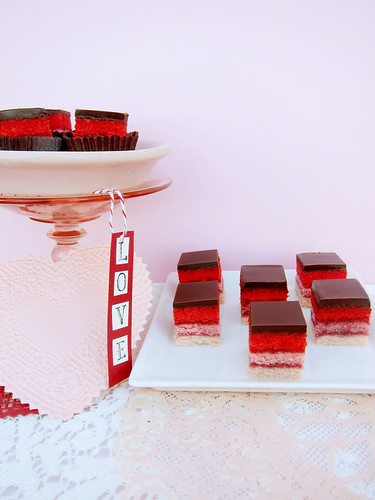
Ahh February, love is in the air. Candy hearts, flowers, chocolate boxes, yada yada yada. Don't get me wrong, I love Valentine's Day! And if there is one thing Valentine's Day means to me, it is creating wonderful Valentine themed baked goods and crafts for all the people I care about. I have a few things on the way to share with you in the next week or so. Up first is my sister's FAVORITE cookie of all time. It is an Italian Christmas cookie, traditionally colored like the Italian flag. They are more like cakes than cookies. Kind of like tiny petit four layered almond cakes covered in chocolate ganache. These are perfect for filling heart shaped boxes and giving to that special someone!
*One note I want to make about this recipe has to do with the almond paste. It generally comes in 2 ways. In a can and in a tube. The can is 8 ounces and the tube is 7. Almost every recipe for this cookie calls for 8 ounces. I can only ever find the tube and it costs almost 10 bucks. I hate to buy a whole other tube just for that one ounce. I almost always have almond meal or almonds in my pantry. For that extra ounce, I just use half almond meal or ground almonds and half sugar with a splash of water. Voila, almond paste.
______________________________________________________
Valentine Venetians:
Makes 50 to 60, depending on size
For the cake:
8 oz. almond paste*
1 cup granulated sugar
3 sticks unsalted butter, room temperature
4 eggs, separated
1 teaspoon almond extract
1 teaspoon vanilla extract
2 cups all-purpose flour
1/4 teaspoon salt
Red and pink food coloring
8 oz. seedless raspberry preserves
For the ganache:
4 oz. semi-sweet chocolate
2 tablespoons heavy cream
1 tablespoon butter
Preheat oven to 350 degrees.
Combine the almond paste and sugar in the bowl of a food processor. Pulse will combined. Add butter, egg yolks and extracts. Blend till light and smooth, 3 to 5 minutes. Add flour and salt and mix just to combine.
Whisk egg whites till stiff peaks form. Gently fold into almond mixture. Divide batter into 3 bowls. Add desired amounts of food coloring.
This next part can be done a couple of different ways. The batter can be spread into the bottom of three 13 x 9 inch pans, but I always found this way to be very annoying.
The easiest way to do this is by rolling the batter between 2 sheets of parchment paper. Start by rolling it out on the counter. Transfer the whole thing to the baking sheet. Place another same sized baking sheet on top and press down to flatten. The batter should be about 1/8 of an inch thick.
Place in oven with both sheets of parchment paper and bake for 15 minutes. Let cool completely.
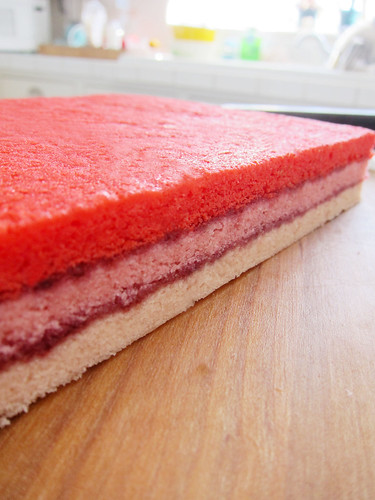
Heat the raspberry preserves in small saucepan. Brush a layer of preserves over one of the cake layers. Top with another cake layer. Brush another layer of preserves on top. Place last cake layer on top. Wrap in plastic wrap. Place in refrigerator and weight down with a cookie sheet and various refrigerator items. Refrigerate for at least 4 hours, preferable overnight.
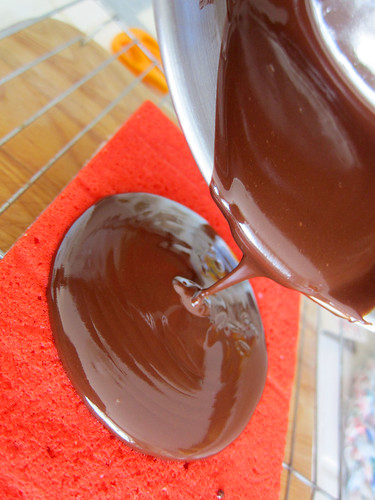
For the ganache, heat chocolate, heavy cream and butter over a double boiler till smooth. Cover the entire almond cake in the ganache.
Once the chocolate is set, cut the cake into 1 inch squares. These are so yummy, they are almost addicting!!
Monday, January 31, 2011
Banana Cupcakes with Orange Cardamom Butter Cream
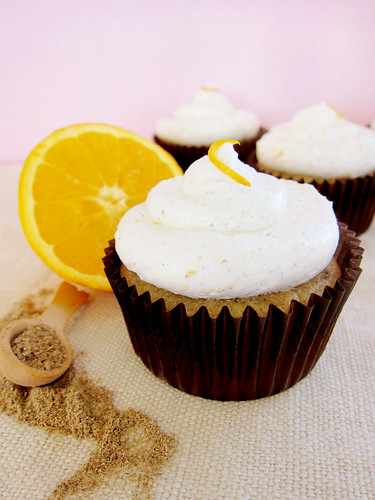
These were great! The banana cupcake was a bit like soft banana bread and the orange and cardamom butter cream paired nicely.
______________________________________________________________
Banana Cupcakes with Orange Cardamom Butter Cream
Makes 12
For the batter:
1 cup all-purpose flour
1/2 teaspoon baking powder
1/2 teaspoon baking soda
1/4 teaspoon salt
1 stick unsalted butter, softened
1/2 cup sugar
1/4 cup sour cream
1 1/2 teaspoons vanilla extract
2 large eggs
2 large ripe bananas
1/2 cup chopped walnuts, optional
Preheat oven to 350 degrees. Line cupcake tin with liners.
In medium bowl, combine flour, baking soda, baking powder and salt.
In a food processor, blend sour cream, vanilla and bananas till smooth.
In the bowl of a stand mixer, cream butter and sugar till light, 3 to 5 minutes. Add eggs, one at a time, combining well after each addition. Add banana mixture alternately with the flour mixture till combined. Careful not to over mix. Bake 20 minutes. Cool completely before frosting.
For the butter cream:
1 cup granulated sugar
4 large egg whites
3 sticks of butter, room temperature
1 tablespoons pure vanilla extract
2 tablespoons orange zest
1/2 teaspoon orange extract
2 tablespoons ground cardamom
Put sugar and egg whites in a double boiler over simmering water. Whisk constantly until the mixture is hot to the touch and looks white, creamy, opaque and slightly thickened, about 5 to 7 minutes. Place into the bowl of a stand mixer fitted with the whisk attachment and whisk for 5 minutes. You will get a thick shiny meringue. After 5 minutes, switch over to the paddle attachment. Set speed to medium high and add soft butter, one tablespoon at a time, incorporating fully before adding more. Once all the butter is incorporated add the vanilla extract, orange extract, zest, and cardamom. Let the mixer run for another 3 to 5 minutes.
Wednesday, January 26, 2011
Rose and Pistachio Macarons
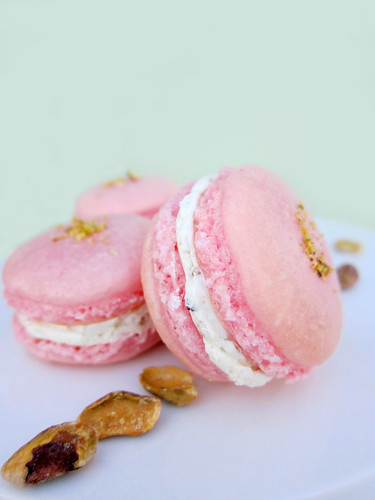
A while back, while in a cute little gift shop, I bought some rose sugar. I always looked at it sitting there in the pantry knowing one day I would find a use for it. Finally the sugar has found its place! I used this Violet Macaron recipe from Tartlett. I just replaced everything violet with everything rose. I also added finely chopped pistachios to the butter cream.
Macarons are tricky little things. Once you understand how they work, they start to come naturally. But you just have to mess up a few times to learn what NOT to do before you can become a master at what you ARE supposed to do.
Macarons are tricky little things. Once you understand how they work, they start to come naturally. But you just have to mess up a few times to learn what NOT to do before you can become a master at what you ARE supposed to do.
It is a fairly simple process. You start by whisking the egg whites till they are just frothy.
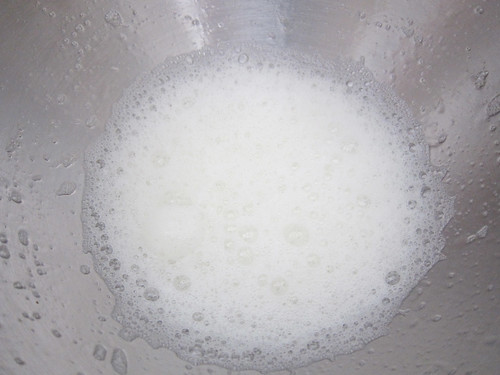
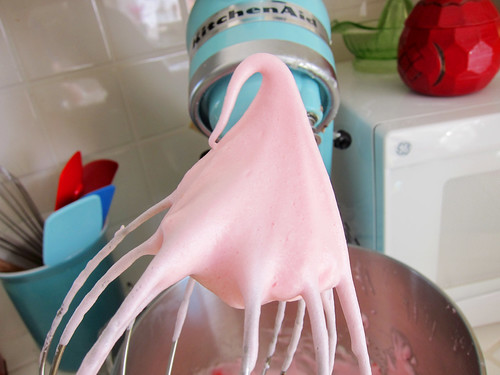
Slowly add sugar till you reach stiff peaks. Careful not to over mix or the egg whites will be too dry! You can also add food coloring at this point.
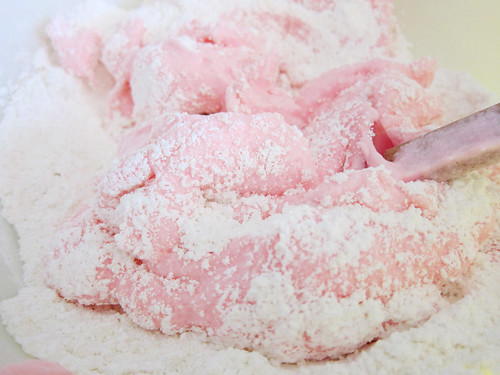
Fold the beaten egg whites into powdered sugar and almond meal. This is the part that determines how nicely shaped your macarons will be. If you don't mix enough, the macarons will be too fat. If you over mix, the batter becomes too unmanageably runny that you can't even pipe the circles. Finding the perfect balance is the key. Tartlett says it should not take more than 50 strokes. As soon as the batter falls back into itself, it should be good.
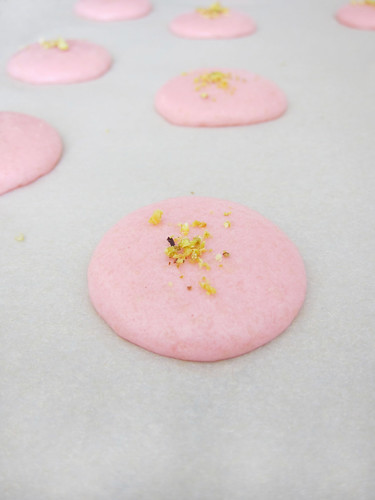
Pipe 1-1/2 inch circles onto parchment lined baking sheets. Top with a little garnish. Let sit on counter for 45 minutes. This dries out the surface of the macaron and creates the macaron's signature "foot" when it is baked. The shell stays in tact and the soft batter underneath puffs up.
Bake at 280 degrees for about 15 minutes. Let cool slightly before trying to remove from the parchment. If you have trouble removing them, a little water underneath the parchment helps to loosen them. Finish them off with a tablespoon of the pistachio butter cream.
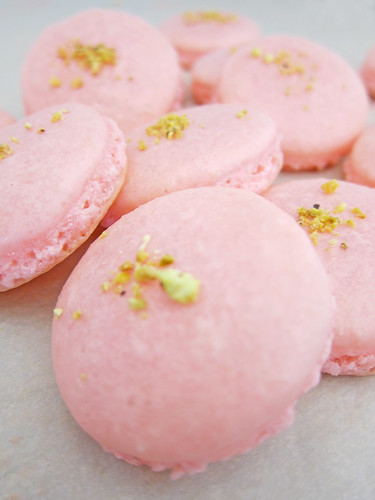
The rose in this was so nice! Not too overpowering. And the pistachio added a nice crunch. I am happy to have finally used the wonderful rose sugar!
Ooh and I just signed up for Blog Lovin!!
Follow my blog with bloglovin

Slowly add sugar till you reach stiff peaks. Careful not to over mix or the egg whites will be too dry! You can also add food coloring at this point.

Fold the beaten egg whites into powdered sugar and almond meal. This is the part that determines how nicely shaped your macarons will be. If you don't mix enough, the macarons will be too fat. If you over mix, the batter becomes too unmanageably runny that you can't even pipe the circles. Finding the perfect balance is the key. Tartlett says it should not take more than 50 strokes. As soon as the batter falls back into itself, it should be good.

Pipe 1-1/2 inch circles onto parchment lined baking sheets. Top with a little garnish. Let sit on counter for 45 minutes. This dries out the surface of the macaron and creates the macaron's signature "foot" when it is baked. The shell stays in tact and the soft batter underneath puffs up.

Bake at 280 degrees for about 15 minutes. Let cool slightly before trying to remove from the parchment. If you have trouble removing them, a little water underneath the parchment helps to loosen them. Finish them off with a tablespoon of the pistachio butter cream.

The rose in this was so nice! Not too overpowering. And the pistachio added a nice crunch. I am happy to have finally used the wonderful rose sugar!
Ooh and I just signed up for Blog Lovin!!
Follow my blog with bloglovin
Subscribe to:
Comments (Atom)

